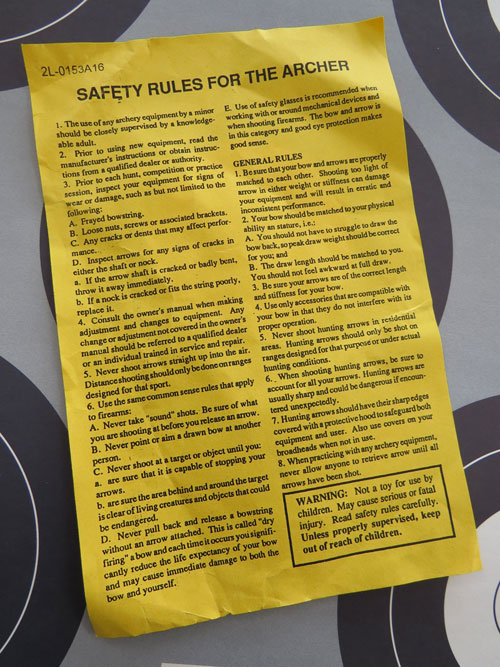
A good archery target is an invaluable thing to the archer who wants to practice at home. A good target lasts a long time. It stops your arrows neither too fast (so there’s no impact stress fatiguing arrows) nor stops your arrows too slowly that they penetrate the target up to the fletching. The target shouldn’t have a grain strong enough to turn the arrow off it’s original path. Strongly grained targets will fatigue arrows and give a poor grouping pattern. Such a target will not give ‘true to arrow flight’ groupings you need to judge your practice progress with. A good archery target needs to be large enough to cover a few ‘flyers’ and make your practice area safe. This is more important if you are a beginner to intermediate archers much more so than an experienced shooters who can shoot at a small target butt and always ‘be on’.
It’s always going to involve a lot less fuss to buy a commercially made target than make one at home. In most cases these are much better than home made targets – especially those targets that you can practice with broadheads on. On the flip side, you can make a home made target larger than is commercially viable for mass produced targets. With a little thought you can make one cheaply too. So if you’re up for it, here’s some DIY archery target ideas…
DIY Target #1 – for youngsters shooting low poundage bows – hay bales. Buy two firm hay bales and stack them on top of each other. You can compress them together with a pair of tie down straps. And for extra points, wrap them in shade cloth like you wrap a gift – this’ll neaten them up proper.
DIY Target #2 – compressed cardboard bales. Ask the store manager of you local supermarket if you can buy a couple. This is important because if you sneak ‘around the back’ and take one – you are stealing. And you risk spoiling this target option for the next archer who comes along who asks respectfully. Most supermarkets get $20 per bale from the recycler so expect to pony up some cash for their Christmas party fund. Do this and they will forklift them onto the back of your ute or trailer for you. At home, you’ll need two strong likely sorts to move the bales in place. Cover them in black builders plastic to protect them from the rain and then shade cloth if you want to make them less noticeable and blend them into the background.
DIY Target #3 – garden bags. At your local hardware you can buy beige coloured garden bags that unfold into a large rectangular/cube. Scrounge time. Carpet retailers have a skip bin out the back with underlay trimmings. They should be more than happy for you to fill your bag from their bin – if you ask. You may have access to shrink wrap at work that keeps incoming goods on pallets in place during shipping. Shade cloth or fly wire (not the metal or plastic kind) works well too. You can mix all these recyclables together too if you don’t have enough of one type. Stomp it all in good and tight. Close the flap type lid with bale hooks (you make hooks with some fencing wire).
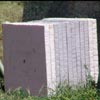
DIY Target #4 – layered foam. If you have easy access to styrefoam or closed cell foam like that used in yoga matts etc – you’re in business. You can also use carpet underlay. Another option is to buy quality closed cell foam and rubber sheets from retailers like Clark Rubber – and they’ll cut it to width for you too. Aim (very punny) for 100cm long strips that are 20cm or more wide – work to the width of foam you have access to so there’s little wastage. At your local hardware store you’ll find threaded rod and timber of the width and length of your foam sections. The timber will be your top and bottom clamps and the threaded rods will tie (and compress) your foam and timber sandwich together. The threaded rod length will determine the height of your targets frame. The beauty of this target is you can loosen off the clamps and reposition the shot out centre layers and clamp it up again. Assemble on a concrete floor so the layers line up flush with the top and bottom clamps.
DIY Target #5 – metal frame and flywire target. This is the one I made and its been going strong for years. The trick is have access to a welder, or a friend with one. It takes more time to cut the steel rod to length with bolt cutters than to weld it up. My frame is 20 cm deep and measures 3ft x 3ft. Cover it light gauge chicken wire and leave the top open for packing. I fill mine with flywire that I get from my local glazier friend Simon. His staff keep a box under their cutting table and fill it with old flywire when they re-do window frames. It saves them landfill fees and they score some Timtams for morning tea when I pick it up. Cover the your frame with shade cloth – just like wrapping a present – I hold the side flaps in place with plastic wire ties. The only modification I’d make on mine is I’d have added wheels on one side so I can 4WD it around it easily.
Another option is to join your local archery club. As a member you’ll have access to their well set up practice range and they’ll have fantastic field courses laid out in bush and forest settings. The busy clubs have regular 3D shoots as well as broadhead targets. There’s no free lunch though. Even if you shoot a few times a year at the club, you still should be prepared to turn up on busy bee days.